In this guide you’ll learn how to set up a customer webhook to create a live view of your ROLLER data in a simple and secure dashboard, and plot your customers on a Google Map to visualise where they’re from.
Are you making the most of your ROLLER booking data in your marketing strategy? You can use the customer webhook to learn more about your customers, and refine elements like ad targeting by putting customer locations at your team’s fingertips in Google Data Studio.
When a new customer record is created, the ROLLER customer webhook sends the record to your system. This also occurs when a customer updates their existing record, or makes other purchases in ROLLER’s online checkout.
In this guide, you’ll learn how to:
- Set up the customer webhook from ROLLER
- Capture customer information in Google Sheets
- Link your Google Sheet to your Google Data Studio dashboard
- Plot each customer’s location on a Google Map
This is just one example of how you can use the customer webhook. You can also send customer information to the Facebook Conversions API as a lead, or to your CRM or email systems (like Mailchimp).
ROLLER webhooks don’t count towards your monthly call limit to the ROLLER API. The setup we demonstrate in this blog doesn’t incur costs outside the ROLLER API subscription.
Tools you'll need
- Postman to set up and manage webhooks
- Google Sheets with an add-on for webhooks
- Google Data Studio to plot customer locations in a Google Map
- The API level subscription of your ROLLER account – reach out to their customer support team if you need an upgrade!
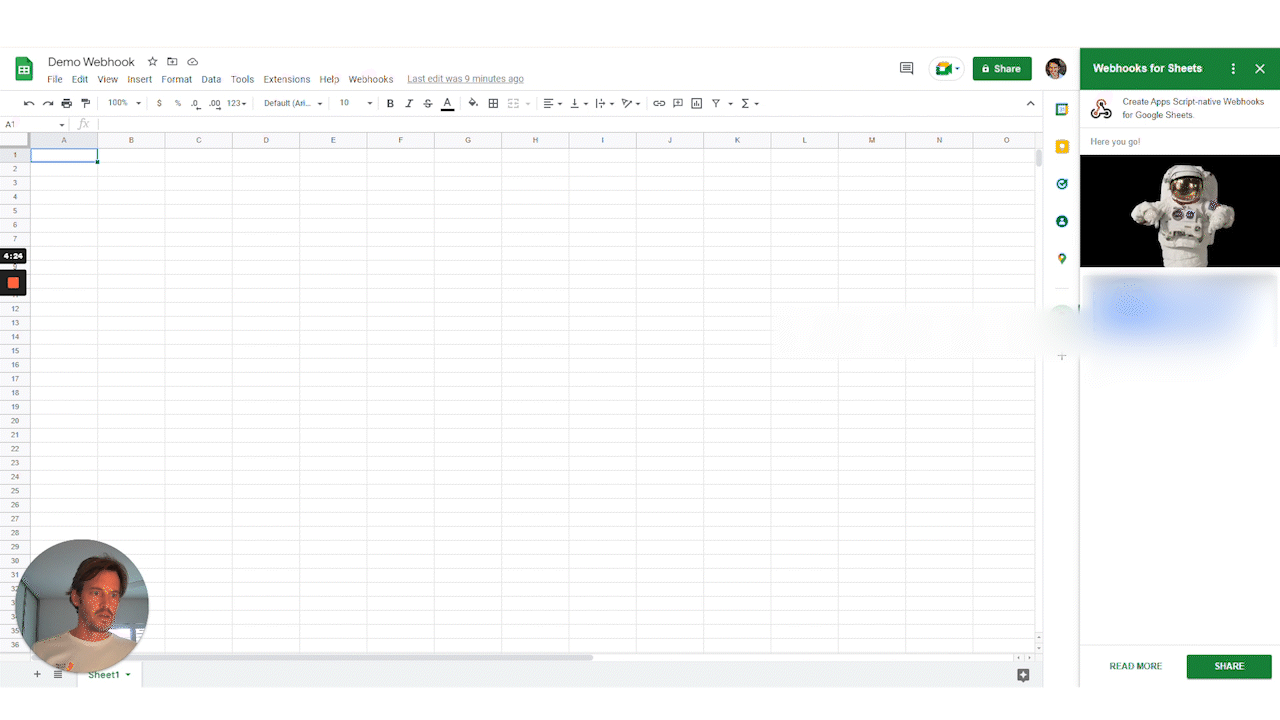
Step 1: Set up your Google Sheet with the webhooks extension
- Create a new Google Sheet.
- Go to ‘Extensions’ and install ‘Webhooks for Sheets’. You’ll need to refresh your sheet until the extension is visible.
- Click on the extension and enable ‘Force 200 OK response status code’ and ‘New column’ to add a timestamp, then click ‘CREATE’.
- Enable ‘Apps Script API’, then click ‘NEXT’.
- Refresh the sheet again and authorise the webhook.
- In ‘Webhooks for Sheets’, click ‘NEXT’ and copy the ‘Webhook URL’ by clicking the URL three times.
Step 2: Set up the customer webhook in ROLLER using Postman
- Open Postman and navigate to ‘Postman Collection’.
- Click ‘Collections’, then ‘Import a new collection’, and then ‘Import via a link’.
- Copy and paste this link to import ROLLER’s Postman collection:
https://www.getpostman.com/collections/5ca4d50917c5e7b75649 - To use the collection, first select ‘Postman Collection’ then click ‘Import’ and use the URL option to paste the above link.
- Check out step two in our previous guide for a more detailed guide to Postman.

Step 3: Webhook REST API Request and Authentication in Postman
- Get an authorisation token by setting the ‘Variables’ to your ROLLER ‘Client_ID’ and ‘Client_Secret’.
- Within your ROLLER Venue Manager, navigate to ‘Integrations’ and then ‘API keys’, and then click ‘Create Client Key’. Give it a name, and then copy the ‘CLIENT ID’ and paste it into the ‘Client_ID’ field in Postman. Repeat the process with the ‘CLIENT SECRET’.
- Within Postman, navigate to ‘Auth Token’ to create an authorisation token. Click ‘Authorisation’ and make sure the type is ‘Inherit auth from parent’. The ‘Body’ should reflect the ‘Client_ID’ and ‘Client_Secret’.
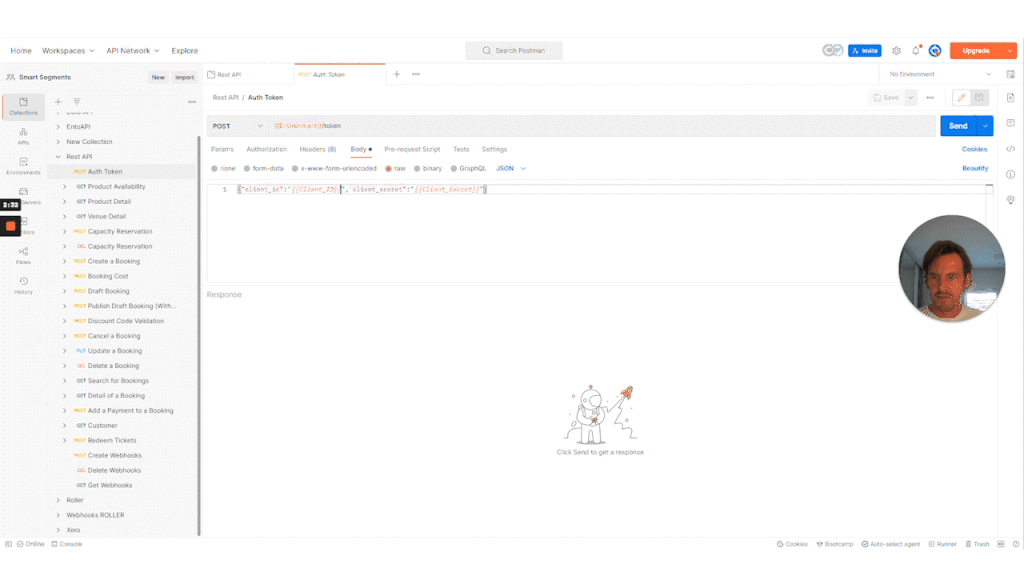
- Click ‘Send’ and copy and paste the code in ‘access_token’, then paste this Bearer Token into the ‘Variables’ field under ‘CURRENT VALUE’.
- Navigate to ‘Create Webhooks’, then ‘Authorisation’, and choose ‘Bearer Token’ as your type. Paste your Bearer Token in ‘Token’ to complete a Post request.
- Edit the ‘Body’ of the request, remove the bookings and redemption objects, and keep the customer objects (we aren’t using the bookings and redemption webhooks in this blog today).
Step 4: Connect ROLLER with the Google Sheet
- In your Google Sheet, copy your ‘Webhook URL’ (see step 1.7). Then in Postman, paste it into the body of your webhook. Click ‘Send’.
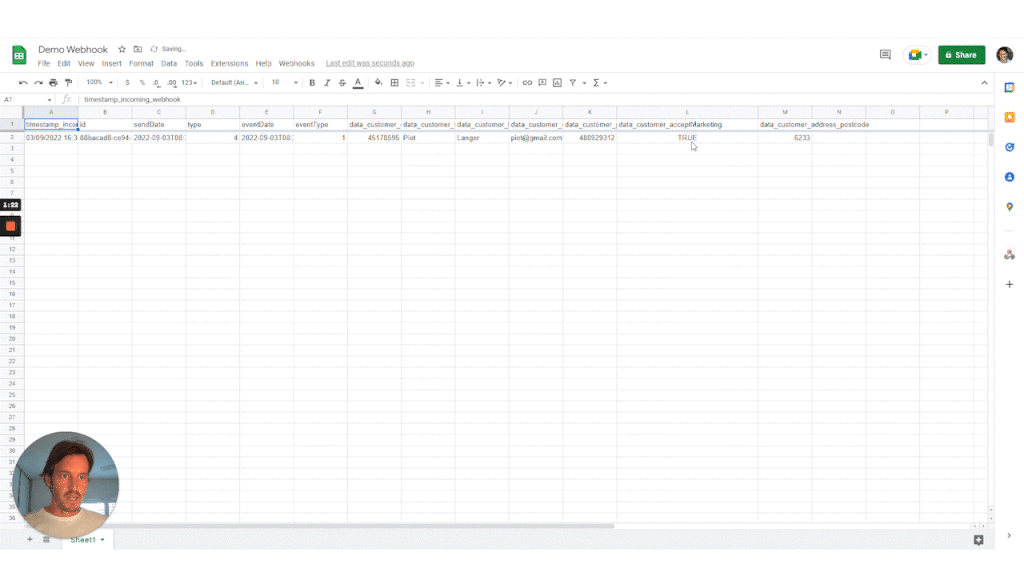
Step 5: Test the webhook’s connection to the Google Sheet
- Enter a test customer’s details into the online venue checkout that’s linked to the venue, making sure you provide a postcode. You don’t need to complete the checkout payment – the data should be added to your Google Sheet before payment is complete.
- Confirm that you’ve captured your test customer’s data in your Google Sheet.
Before you connect to Google Data Studio: customer information (like emails and phone numbers) is sensitive, so make sure that you change the sharing settings of your Google Sheet’s general access to ‘Restricted’.
Step 6: Connect to Data Studio Dashboard and plot your customer map
- Open Google Data Studio. If you’re new to Data Studio, you’ll need to log in and authorise it.
- Create a new report and navigate to ‘Add data to report’, then click ‘Google Sheets’ and connect your sheet. In ‘Options’, make sure you’ve enabled ‘Use first row as headers’ and ‘Include hidden and filtered cells’. Click ‘Add’.
- The data widget will appear as a simple table, and should show your test customer entries.
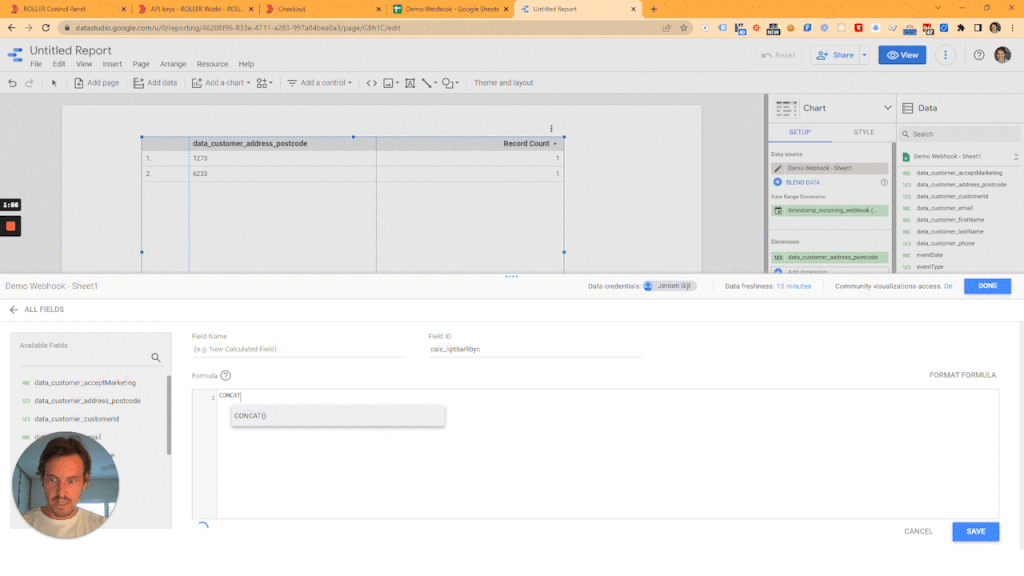
- We need to add a special field to pull through the country. You can do this by editing the data source by clicking the pencil and ‘ADD A FIELD’. Then in the formula box add ‘CONCAT(data_customer_address_post code,”Australia”), name the field “Address” and click ‘Save’.
- Now add the new field “Address’’ under ‘Dimensions’.
- Add your Google Map as a chart and plot the new address field we created by adding the “Address” field to ‘location’ and add “Record Count” to ‘Size’.
- You can change the map’s style to your liking under ‘STYLE’. Each time a customer adds their details, you’ll see a new bubble on the map. It’ll refresh every 15 minutes to one hour.
- You can now share your report with your team by granting them access.
How to delete your webhook
Delete your webhook setup in ROLLER:
- First, find the webhook ID of the webhook you want to delete by running the ‘get webhooks request’. Navigate to the three webhook endpoints and select the ‘Get Webhook’ endpoint.
- Under ‘Authorisation’, click the ‘Inherit from parent’ tab and switch it to ‘Bearer Token’.
- Starting with two curly brackets, choose the ‘Token’ and click ‘Send’.
- Copy the webhook ID at the top of the ‘Body’ of the response.
- Now navigate to the ‘Del Webhook’ endpoint and enter the webhook ID into the request URL.
- Under ‘Authorisation’, click the ‘Inherit from parent’ tab and switch it to ‘Bearer Token’.
- Starting with two curly brackets, choose the ‘Token’ and click ‘Send’.
You’re ROLLER ready!
In this guide, we’ve used ROLLER webhooks to plot your customers on a Google Map, but there’s a lot more you can do with ROLLER’s APIs and webhooks.
Make the most of your ROLLER account and learn more from our knowledge base.
Need help? Drop us an email at jeroen@smartsegments.ai