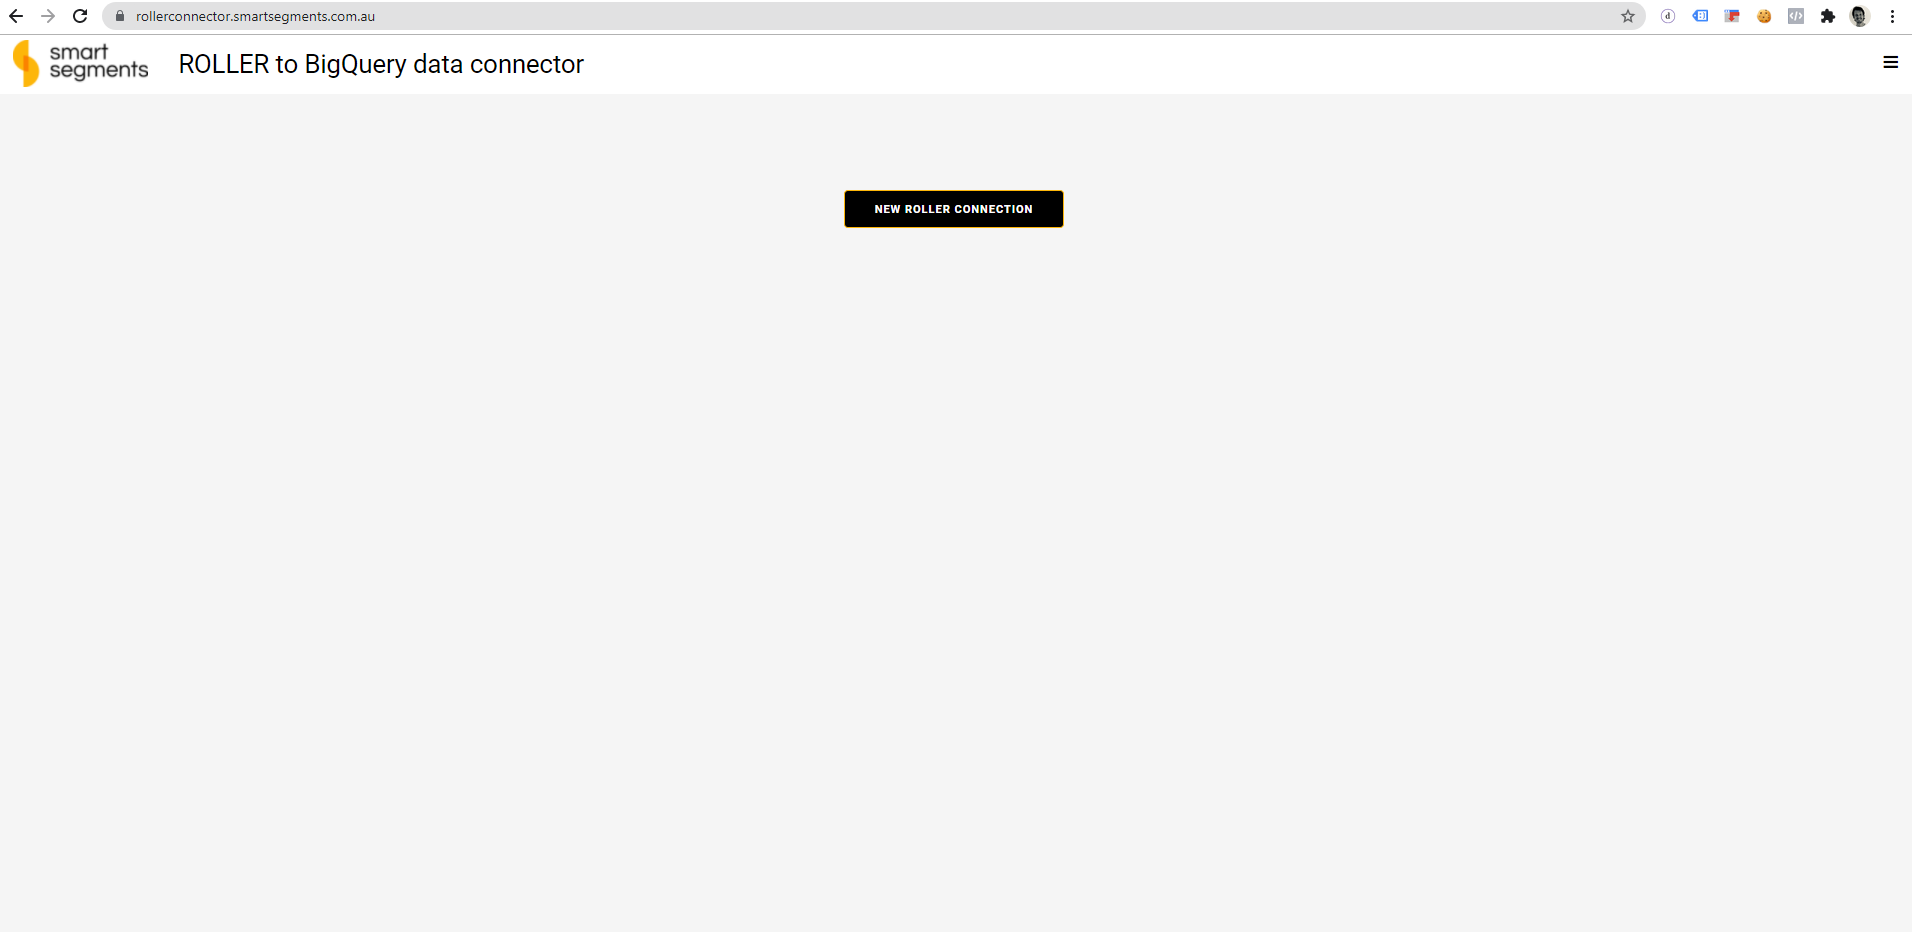
After you completed the checkout you need to refresh the page for the connector to recognize you are a subscribed user. The refreshed page looks like below. Now click on “New Roller Connection”.
- Connection Name: First give your connection a new of your choosing.
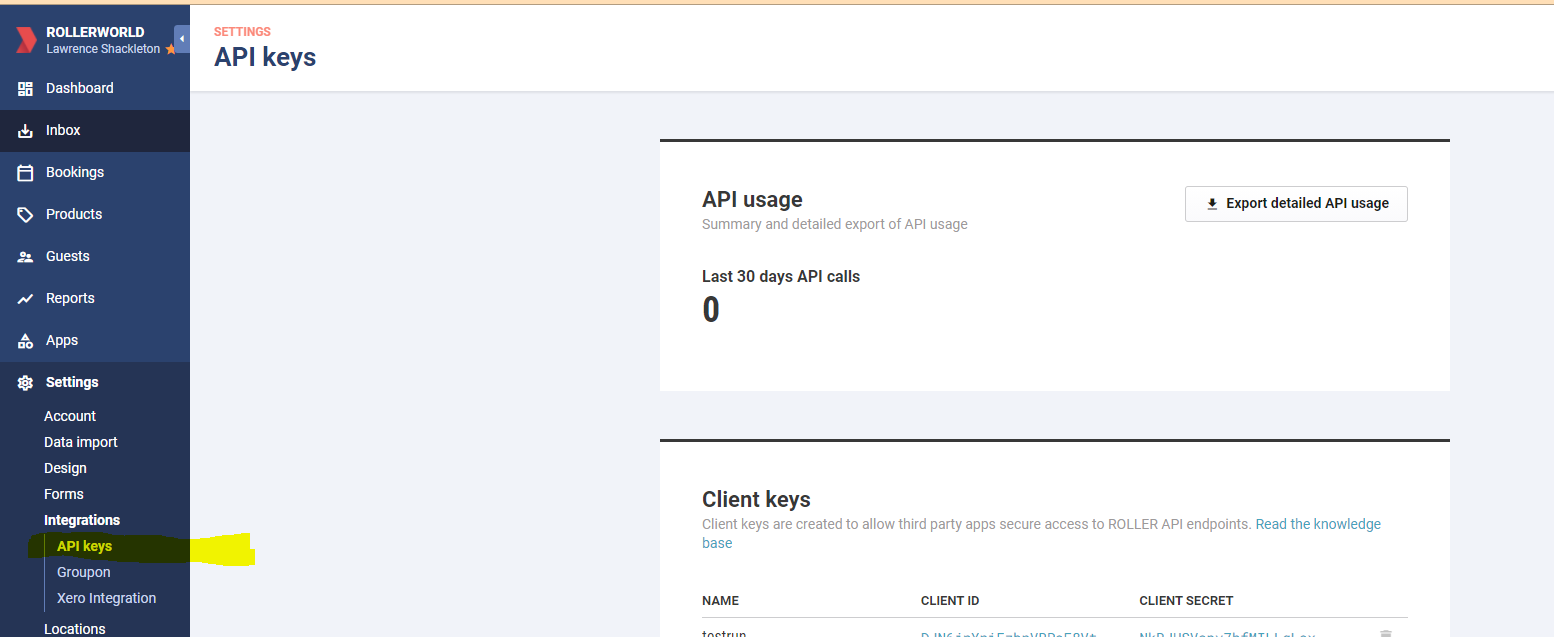
- Client ID, Client Secret: Next navigate to your ROLLER Venue Manager to Settings->Integrationts->API Keys and copy the client key and client secret from here and paste in the corresponding field in the connector setup page. If you don’t see your API Keys in your Venue Manager please contact ROLLER support to upgrade your subscription to include API access.
- Venue Timzone: Choose your timezone
- First Fiscal Month: Select the Month at which in your Venue’s Country the fiscal year starts. This will be used to consolidate the summary Tables the connector will create for you.
- Sync Start Date: The historic date you like to start collecting your ROLLER Venue data. This might be the date you first started using the ROLLER systems.
- Sync Frequency: How often do you like the connector to fetch the latest data? The hourly will fetch your data every 2 hours (to remain in the TIER 1 ROLLER API plan). If you like this to be more frequent please contact us or ROLLER support.
- Entities To Sync: Select which Data Endpoints you like to fetch from the ROLLER API. Note that this selection can’t be changed after the setup. A description of the Data in each endpoint can be found here
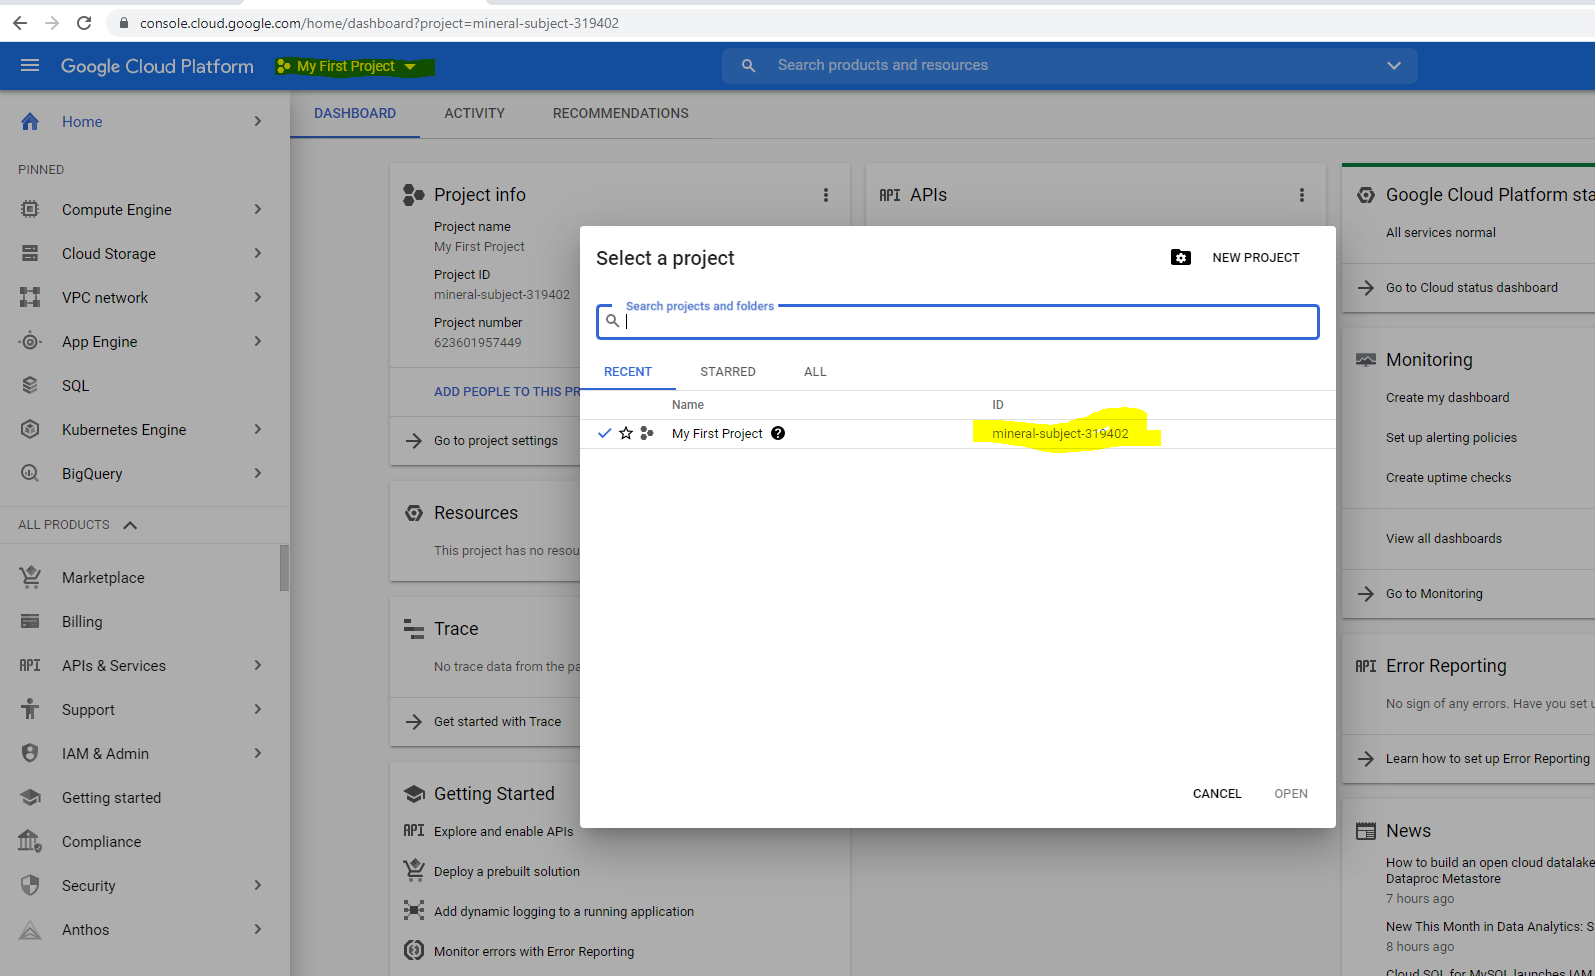
- Project ID: Copy your Project ID from your Google Cloud Project as per this screenshot and copy in the corresponding field in the setup page.
- BigQuery Dataset Name: Choose a name you like to give your Dataset in BigQuery. Don’t use spaces or any special characters. The connector will create this dataset for you but if you have already created a dataset yourself use that dataset name.
- BigQuery Dataset Location: Choose the location you like to use for your dataset. Note that if you are using a preexisting dataset make sure you select the same location here!
- Use Your Own Service Account: To access your Google Cloud Project we use a Service Account. We recommend selecting NO here. If you select NO please grant ss-tools-roller-bq-connect@appspot.gserviceaccount.com (for connections outside Europe) and ss-tools-roller-bq-conn-eu@appspot.gserviceaccount.com (for connections in Europe) the BigQuery Admin role from IAM .

- If you select YES please upload the JSON key file generated from a service account with at least BigQuery Admin role in your Google Cloud project
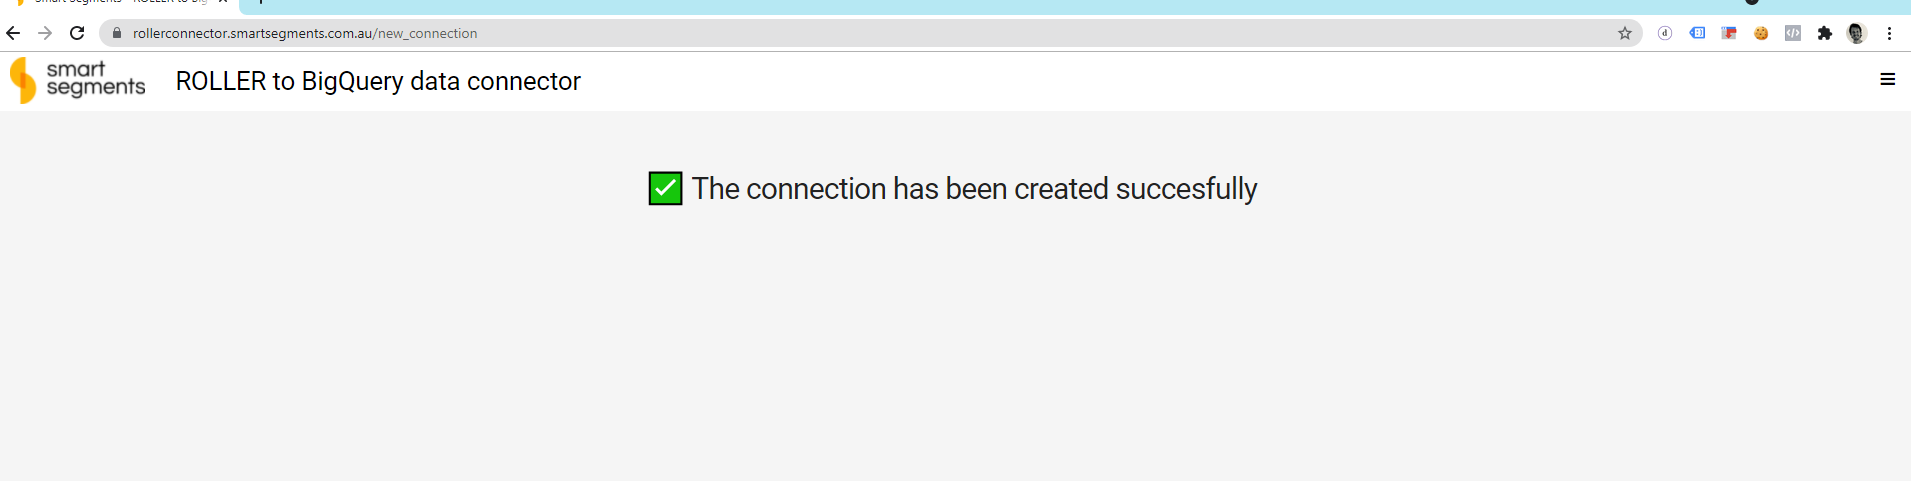
Finally click “Complete Setup”. The next screenindicates the setup was successfull.
If you now navigate to your BigQuery Instance you will see your data getting loaded.
Open the dashboard template link and navigate to the right hand corner to make a copy of the template.
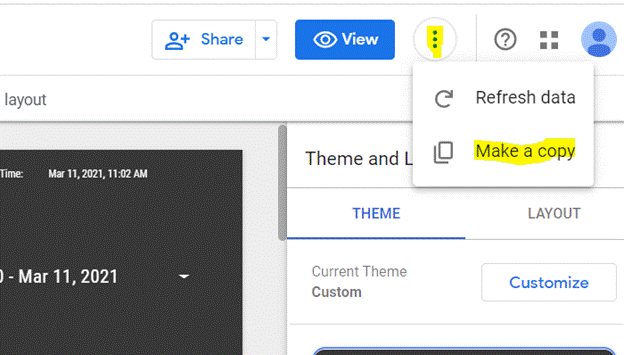
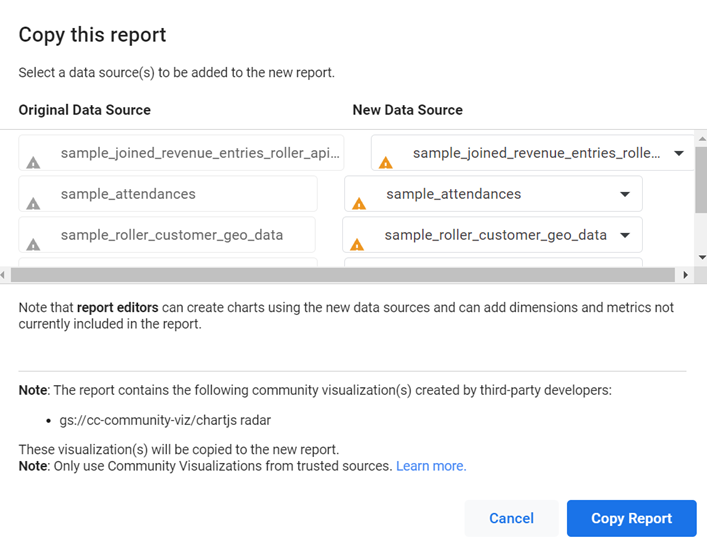
To copy the report you will need to select your BigQuery tables as data source in the ‘new data source’ dropdown and replace the sample tables with the tables from your dataset as highlighted in point step 10. Click on the dropdown on the right.
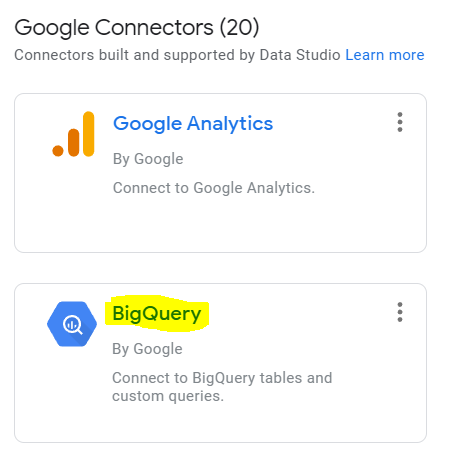
Click on ‘Create data source’.

Select BigQuery from the connectors options available
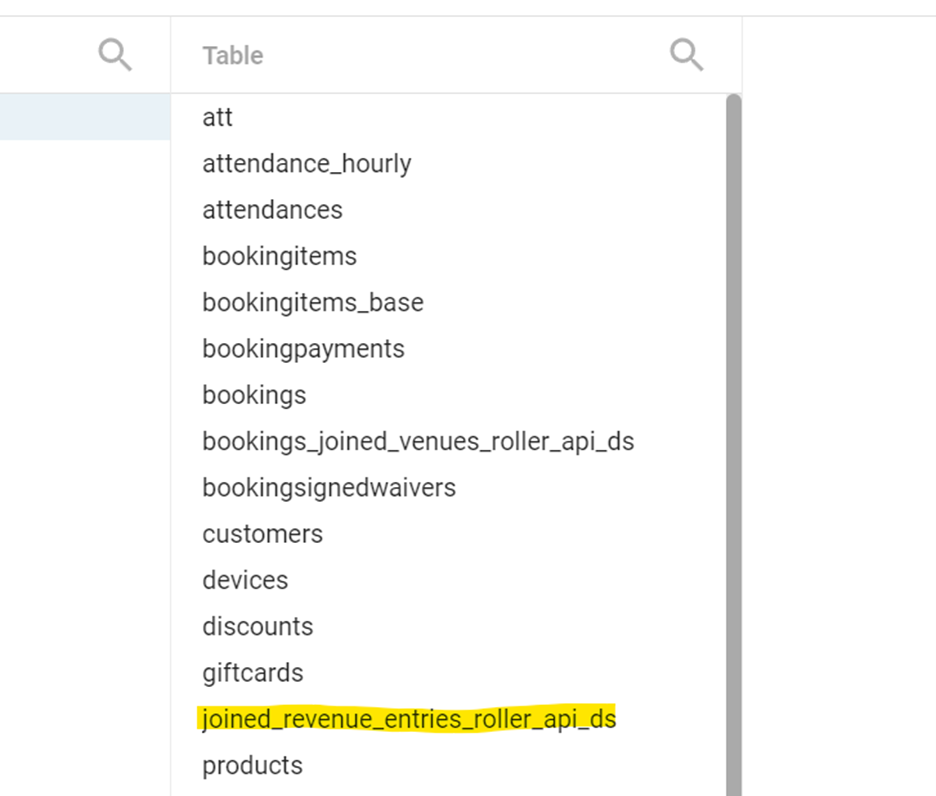
Navigate to your ProjectId > reporting > joined_revenue_entries_roller_api_ds
Click on ‘add to report’. You will be directed back to Step 12 with one table replaced as shown below.
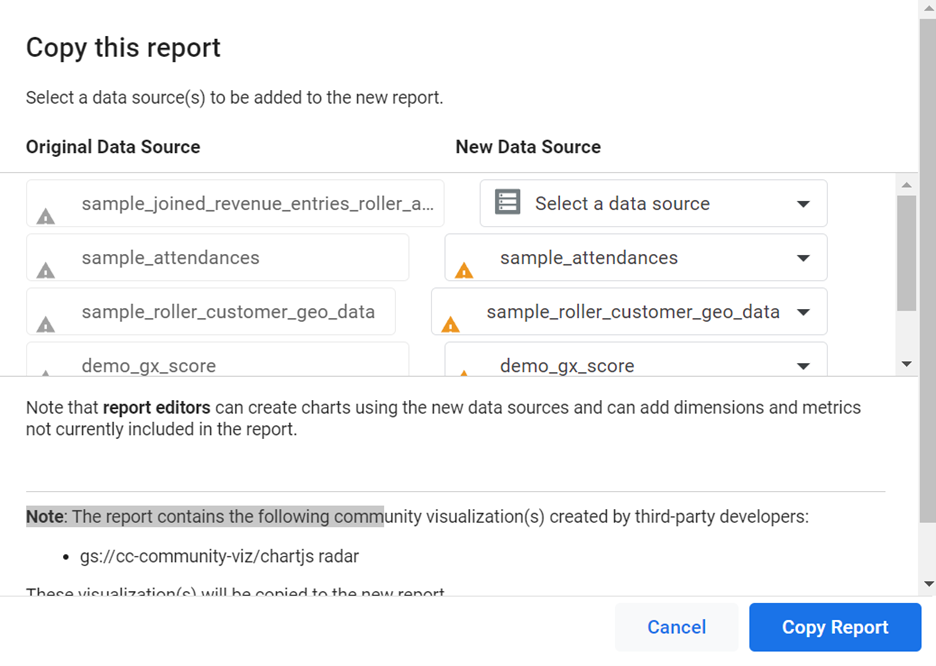
Repeat STEPS 13 & 14 for the below connections as shown in the picture
- Replace ‘sample_attendances’ with ‘attendances’
- Replace ‘sample_roller_customer_geo_data’ with ‘roller_customer_geo_data’
Note:
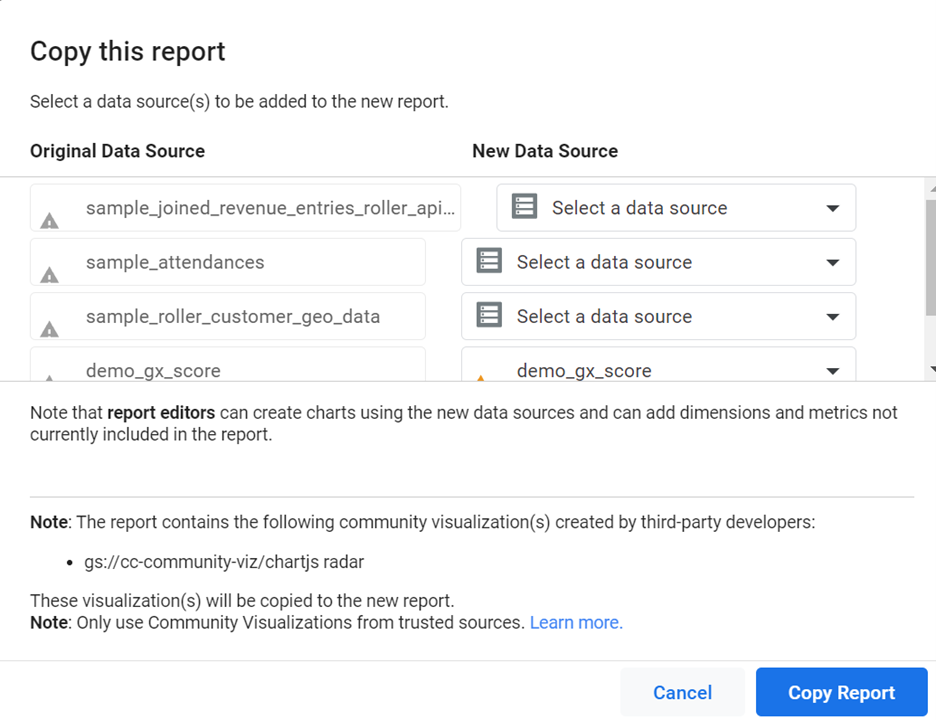
There might be a visual glitch as seen in the above picture where after replacing the dataset it still shows ‘Select a data source’. But that should be fine. Apart from that, the other data sources are for the membership page and the guest experience page. They will need to be enabled through a custom setup. Please reach out to us for more info.